

Absolutely — holes, pinholes, or missing grout in your shower are significant issues. They shouldn't be considered a “fix it next month” scenario. When water penetrates behind the tiles, it can lead to framing damage, mould growth within the wall cavity, or leaks appearing on the ceiling of the room below. Typically, the grout itself isn't the primary culprit — it acts as a symptom of a larger problem. Something else has shifted, failed, or was improperly installed. This page explores the causes of grout issues, when do-it-yourself fixes may be effective, when to engage a professional regrouter, and an overview of potential costs in Sydney by 2026.
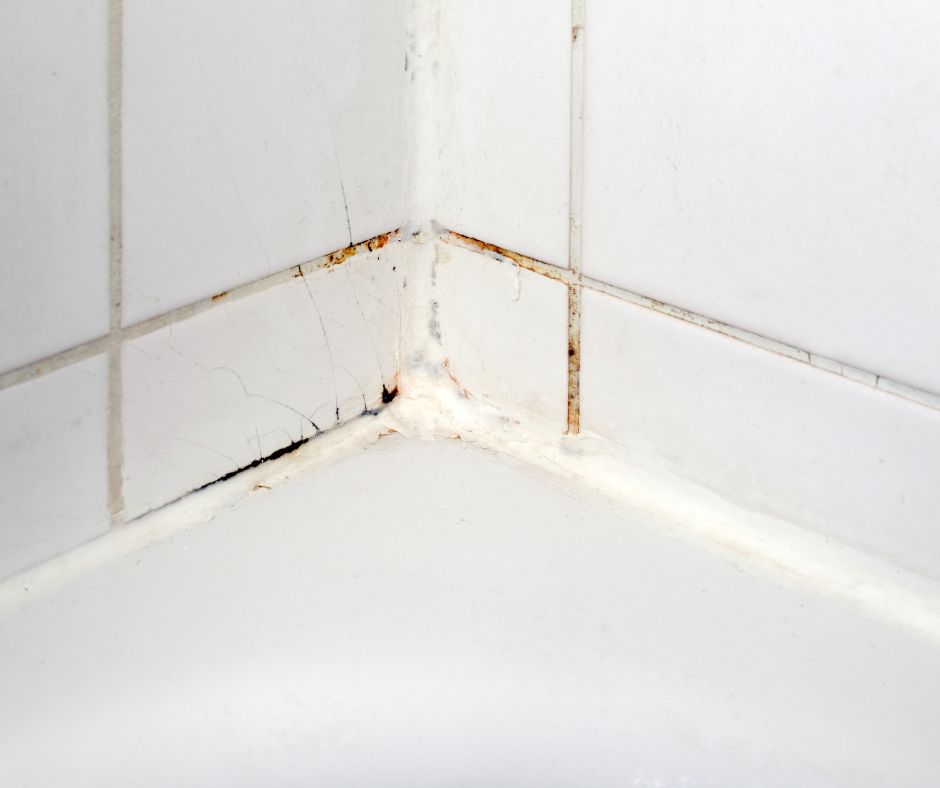
Are holes or pinholes in shower grout a serious issue?
The short answer is yes, without exception. Grout serves as the waterproof barrier between tiles. Any holes present create a pathway for water to reach the substrate. Even pinhole-sized openings can gradually allow moisture to seep into the cement board or plasterboard behind the tiles. This is where slow, destructive damage occurs — resulting in soft walls, mould formation within the cavity, and ultimately leading to framing rot or unsightly stains on the ceiling below.
Pinholes are often overlooked because they seem cosmetic. they are far from harmless. Surface tension may prevent you from noticing water entering these holes, but warm shower water with detergents can easily penetrate. By the time visible damage occurs, the wall behind has likely been damp for months.
It's important to distinguish between a few hairline cracks and actual holes. Hairline fractures generally result from surface shrinkage in cement-based grout — they may be annoying and eventually problematic, but they develop at a slower rate. Real holes, missing chunks, or pinholes that extend through the grout depth require immediate attention.
What factors contribute to holes in shower grout?
With over 26 years of experience in Sydney bathrooms — covering areas such as the Hills District, North Shore, Eastern Suburbs, Northern Beaches, and Inner West — we have identified five common causes:
- Degradation of cement grout. Standard cement-based grout absorbs moisture. With each shower, moisture infiltrates the joint, and over 5 to 10 years, the binder deteriorates. The grout effectively erodes back into the joint, which is the most frequent cause we encounter in older bathrooms.
- Poor initial installation. Grout may have been mixed too dry, inadequately packed into the joints, or air bubbles left unaddressed before it set. These pinholes were present from the start — they simply took time to manifest.
- Substrate movement. If the wall sheet or floor flexes due to poorly fixed cement board or a settling slab, the grout can crack and chip away at points of high stress. This typically presents as linear cracks rather than random holes.
- Aggressive cleaning methods. The use of acid-based cleaners, abrasive pads, or stiff brushes can gradually erode the binder from cement grout. The grout may appear clean, but it has become thinned out and filled with micro-holes.
- Improper previous repairs. If someone attempted to patch over old grout without removing the failing grout first, the new grout will not bond effectively. Patches can fall out within 12 to 18 months, leading to more holes than originally existed.
What steps should you take if your contractor left holes in the grout?
This situation occurs more frequently than most people realise. After a bathroom renovation, everything may look perfect for a couple of weeks, only for pinholes to appear on the shower wall or chunks of grout to fall out near the corners shortly after regular use.
If your bathroom was completed within the last 12 months and you can reach the original tiler, that's your best first step. Most reputable tilers will return to rectify grout failures within their workmanship warranty period. Document any holes with date-stamped photos and communicate them in writing to create a record.
If the tiler is unreachable, has gone out of business, or refuses to return, you have two options in New South Wales: file a complaint with NSW Fair Trading if the work is still within their warranty period, or hire another contractor to fix the grout and seek reimbursement separately. Many of our remedial jobs stem from failed installations, as clients prefer to have their showers fixed and waterproofed immediately rather than waiting for a protracted dispute.
When you bring in a regrouter for a contractor-related issue, ensure you receive a written assessment. We document our findings, including the original grout type, depth of failure, and any evidence of installation issues. This documentation can be valuable if you decide to pursue the original tiler.
What can you expect to pay for shower grout repair in Sydney in 2026?
Two distinct types of jobs fall under the umbrella of “grout repair,” and the cost can vary significantly between them.
Patching a few isolated holes: This typically costs between $200 and $500 for a callout. This approach is only advisable if the rest of the grout is genuinely sound and you've pinpointed a specific cause (such as one chipped area or a single corner failure). We don't recommend this method often because patched grout never blends seamlessly with existing aged grout and often fails again within two years, as the surrounding grout is likely to deteriorate next.
Full shower regrouting (which most cases of “holes in grout” ultimately require): This can range from $1,400 to $2,500 for a typical residential shower. This process involves completely stripping the failed grout, preparing the surface, applying new epoxy grout (commonly Ardex EG15), and resealing the silicone in the corners. The shower will be out of action for 24 hours, and it comes with a 10-year warranty on the grout itself.
The price can vary based on the size of the shower, the current condition of the grout, whether silicone resealing is included, and the extent of the preparation required. Walk-in showers and dual-head enclosures tend to be on the higher end of the scale, while standard 1.5m × 1.5m enclosures are generally less expensive.
For context, a full bathroom renovation in 2026 starts at around $25,000 and can exceed $50,000 with proper waterproofing. If the bathroom is otherwise sound, regrouting at approximately $1,500 is the appropriate solution 70% of the time. In the remaining 30% of cases, the tiles or substrate may need replacing, necessitating a builder rather than a regrouter.
When can DIY grout repair be a viable option?
The honest truth is that DIY grout repair can be effective under certain conditions, provided you have the right materials and the patience to prepare properly. Where it often falls short is in the preparation phase.
DIY is feasible when:
- It’s a non-primary bathroom, allowing for a long weekend without access.
- The holes are localised — affecting just one corner or section, not the entire shower.
- You use epoxy grout (not cement) and have watched a few credible videos on mixing the correct ratio.
- You have an oscillating multi-tool with a grout removal blade — manual grout saws can work, but you'll spend 4 to 6 hours on what a tool could accomplish in 2.
- You can properly plastic-sheet the bathroom and wear a P2 mask to manage the dust.
Avoid DIY when:
- It’s your only or primary shower and losing access for 3 or more days is not an option.
- The holes are widespread throughout the shower — that's a full regrout job, not just a patch.
- You notice signs of water damage behind the tiles (soft walls, stains on the opposite side, or ceiling damage below).
- It’s a rental property and you require warranty-covered work.
- You can see the cement board behind the grout — that indicates substrate damage, not just a grout issue.
The most common failures in DIY jobs stem from incorrect epoxy mixing (the resin-to-hardener ratio is critical — too much resin results in no cure, and too much hardener leads to premature setting), only removing the top layer of grout (new grout won’t bond to old grout, causing failure within 18 months), and attempting to colour-match aged grout (which is nearly impossible, leading to visible patches).
If you choose to DIY — a quick guide
If you’ve determined that this is a DIY task, here’s a concise overview:
- Remove ALL the failed grout in the affected area — not just the visible holes. Aim for a depth of at least two-thirds of the grout joint. Use an oscillating tool with a grout removal blade, wear a P2 mask, and plastic-sheet the bathroom.
- Vacuum and wipe the joint clean. Allow it to dry completely before regrouting; any remaining dust will compromise the bond.
- Utilise epoxy grout instead of cement. Premium options like Ardex EG15 are preferred by professionals because they resist water absorption, prevent mould growth, and last over 10 years.
- Mix according to the ratio specified on the packaging. Epoxy is sensitive to wrong ratios — either too much resin results in no cure, or too much hardener causes rapid setting.
- Push the grout into the joints at an angle using a grout float. Ensure it is properly worked into the joint rather than just spread over the surface.
- Wipe back with a damp sponge (not soaking wet) within the working time indicated on the packaging. Rinse the sponge frequently.
- Allow a 24-hour curing period before exposing it to water.
If you skip any of these steps, the repair is likely to fail. This is the fundamental difference between DIY and professional work — we have completed this task thousands of times, making the preparation process second nature; beginners often rush through steps.
When is it best to hire a professional regrouter?
Engage a professional if any of the following conditions apply:
- It’s your primary shower and you can’t afford to lose access for a weekend.
- The holes are widespread instead of localised.
- You’re noticing leaks in adjoining areas (such as stains on the ceiling below or soft walls behind).
- It’s a rental property and you require warranty-covered work.
- You want to change the colour during the process — epoxy is available in various shades including white, grey, charcoal, beige, and colour-matched options.
- The bathroom is older and you suspect that the cement grout is failing across the entire area, not just at the holes.
We offer free onsite quotes that take about 30 minutes. During this time, we assess what is actually failing (grout, substrate, silicone, or pipework) so you avoid unnecessary costs for fixing the wrong issue.
Common queries addressed
Is it possible to simply patch holes instead of regrouting the entire shower?
Occasionally — but it’s often not worth it. Patched grout typically does not visually match the surrounding aged grout, and the neighbouring grout is likely to fail soon after. We may provide a quote for a patch job if the grout is genuinely sound elsewhere and the issue is localised. in most cases, full regrouting is the more cost-effective solution.
What is the expected lifespan of a professional regrout?
With epoxy grout and proper preparation, you can expect 10 to 15 years of durability. We use Ardex EG15 and adhere to Ardex Academy accredited installation practices, ensuring compliance with AS3740-2010 (the Australian Standard for waterproofing of domestic wet areas). A 10-year warranty accompanies the grout.
How long will the shower be out of service?
The job typically takes one day on site, followed by a 24-hour curing period. For example, if we work on a Wednesday, you can expect to use your shower by Thursday evening. The rest of the bathroom remains fully functional during our work — including the toilet and basin, with no need for plumbing isolation.
Are small pinholes in my grout really a concern?
Absolutely. While pinholes may appear cosmetic, they allow water to penetrate. Surface tension can conceal this occurrence, but warm, soapy shower water passes through without issue. Over time, moisture accumulates in the substrate. We receive calls about “tiny pinholes” that have resulted in over $5,000 in framing damage — it’s wise to address them before they escalate into a structural issue.
Will regrouting resolve a leaking shower?
If the leak is due to failed grout or silicone, then yes. if it's caused by a cracked tile, a damaged shower base, or issues with behind-the-wall pipework, then no. We conduct a thorough diagnosis during the onsite quote. If regrouting isn’t the appropriate solution, we will inform you and decline the job rather than proceed with work that won’t resolve the issue.
Do you provide service in my suburb?
Yes, we operate Sydney-wide, including the Hills District, North Shore, Eastern Suburbs, Northern Beaches, Western Sydney, and Inner West. Our family-run business has over 26 years of hands-on experience.
Schedule an onsite quote today
If you have holes in your shower grout, delaying action increases the risk of incurring water damage costs in addition to the regrouting expenses. Our onsite diagnosis takes around 30 minutes and is provided at no charge. We will clearly advise whether regrouting, patching, or a referral to a builder is necessary for your situation.
Call 1300 815 512 or book a complimentary onsite quote.
Leaking Showers Sealed — Andreas Jagle, owner. NSW Contractor Licence 89111C. Ardex Academy accredited. AS3740-2010 compliant. Over 135 five-star Google reviews. Proudly servicing Sydney’s Hills District, North Shore, Eastern Suburbs, Northern Beaches, Western Sydney, and Inner West.
Original Article First Published At:

You’ve touched on a critical point that many homeowners might overlook. I recall a friend who had a minor pinhole in their shower grout and thought it could wait for a later fix. Fast forward a few months, and they ended up with not just water damage behind the tiles but also some pretty hefty mould issues that required a complete renovation. It’s fascinating how something that seems small can burgeon into a larger concern if left unaddressed.
It’s interesting to see how often the little details in our homes can lead to bigger issues if they’re not addressed promptly. I remember when I first moved into my house; I thought those tiny cracks in the grout were merely cosmetic issues that could wait for later. It didn’t take long for me to realize that neglecting such small signs can lead to an astounding array of problems, from unsightly mold to serious water damage.
You touched on a really important point about those seemingly minor details in our homes. It’s fascinating how often we might dismiss small issues, thinking they’re trivial, only to later realize they can snowball into something much bigger. It sounds like your experience with the grout cracks was quite an eye-opener.
It’s interesting to think about how often we underestimate the importance of something as seemingly small as grout. I remember when I first bought my home; I was excited about the charm of the vintage tiles in the bathroom. However, over time, I noticed that some of the grout was crumbling and had developed pinholes. At the time, I just thought, “It’s just grout; I can deal with that later.” How naive that was!
You make some solid points about grout issues, and it’s so true that many people underestimate the importance of those tiny pinholes. When I recently remodeled my bathroom, I discovered the hard way just how damaging a seemingly small problem can be. I thought I could patch up a few cracks myself, but after a heavy rain, I ended up with some serious water stains on my kitchen ceiling below.